Our new blog and where to find us for now!

Hi folks –

Just a quick note to let you know that we are moving DIY Passion to a new platform this week! We aren’t completely finished meshing the two sites, so if you are an email subscriber, you likely won’t see the notifications for the next while.

BUT – we are updating our Facebook and Twitter feeds and you can now find DIY Passion here on this new and improved site!

Our kitchen post goes up tomorrow for good. We realized with the server switch that it was posted in error last Wednesday… whoops! But it’ll be back up on the new site bright and early tomorrow morning 🙂

We also may have lost a few comments that were put up over the last week… We definitely weren’t ignoring you! But the switch means some may have fallen through the cracks and for that we apologize. Our new site will have comments enabled though 🙂

Hope you’ll hop over to see the new digs!!

Eventually and very soon, things will go back to normal and you’ll be able to access our content exactly the same way you always have – through email and through diypassion.com – it’s just taking a little bit to get things running smoothly again.

Thanks so much,

Erin and Dan

I shall wear purple & A Mother’s Day FREE Printable!

It is Friday – yes it is. And normally, we’d be posting our BHCH today. Dan and I have decided to transition that series into a monthly – and make the posts a bit more robust. It’ll be great (we hope!)

Today – in the spirit of BHCH – I thought I’d share something very special with you. It is not expensive. It is not even really precious. It is just a poem in a frame that once hung in my Gramma’s master bathroom. Yes, in her bathroom!

But she loved the poem. It’s called Warning by Jenny Joseph and it will forever remind me of her. When she passed away, I asked for the print and the frame. It’s stuck with me ever since. Mothers Day Poem 1

As the years have passed, it’s amazing to see how my Mother (the oldest of her siblings) has taken on the role of nurturer and matriarch in our family. She becomes more like my Gramma every day – with her keen sense of wit, love for a good shop, doling out of sage advice, cooking roast beef (!) and her intense love of family and home.

I love how now that means this poem reminds me of two of the strongest, most beautiful women in my life. Mothers Day Poem 2

So while I won’t change my ‘printable’ because it has sentimental value, I thought I’d make a couple up for you! These should print out nicely and fit into an 8×10 frame 🙂 Just click the download PDF link and save it to your computer.

I made one with triangles …Purple Triangle Printable


Click here to download the Triangle Patterned Printable!

and another with polka dots.Purple Polka Dot Printable

Click here to Download the Polka Dot Patterned Printable!

One is landscape and the other is portrait, so you can choose which works best for you! I’m sure you have a whimsical, fun-loving, lady in your life who’d love to hang this somewhere in her home 🙂

Perhaps today, I shall wear purple?

😉

Erin

Ten Favorite Things for Mother’s Day

We’re celebrating our Moms today at DIY Passion.

Here’s a little round-up of some of our favourite gifts for those special ladies 🙂 Links to all the items are listed below the graphic.

10 Favorite Gifts for


1. Print from Etsy // 2. Planters from West Elm // 3. Coach bag from The Bay // 4. Vegan Cookbook from Indigo // 5. Kate Spade Polka Dot Watch // 6. Peony Scented Candle from Indigo // 7. Print from Etsy // 8. Yellow Iguana Outdoor Sculpture by CB2 // 9. Bird Feeders by CB2 // 10. Gold Watch by Kate Spade


Any other ideas out there? Don’t you LOVE that Iguana?? haha. Yes, there are two watches on the list – but they are both so cute.

Thanks for reading!

Love you Mom!!

Erin and Dan


Family games table with homemade chalk paint

Hi friends!

It’s been a good while since the last furniture reclaim we shared with you. Dan has been fine tuning his ‘vision’ for our rec room for a while and we’ve been picking away at updates down there. This table re-do played right into that and came at a perfect time. (Read: before tackling ANY of the painting in the laundry room! That meant I could get drips on the floor AND on the walls… haha!)

In terms of technique though, I tried something a bit different this time. We’ve had this small, drop leaf table for years. It once served as our dining room table in our condo. Then it was our folding table in the laundry room here. Since we have new (and exciting!) plans for the laundry room, it moved to Dan’s rec/man room. We decided it is the perfect thing for a ‘games and puzzle’ table. It tucks away as a console when the leaves are down and then expands when we’re playing a board game or doing a puzzle.Chalk Paint Table Cover Page

BUT – The paint job was lacking. For one thing, it was a boring brown colour. Beyond that, the finish was milky for some reason. And then, it got chipped and scratched when we moved. It needed some new life!Chalk Paint Table BEFORE

Dan’s favourite colour is yellow. So we picked the ‘yellowiest’ yellow we could find that wasn’t too garish, settling on a quart of Calabash by Pittsburgh Paints. We bought it in a flat sheen.

I’ve been seeing so much about chalk paint out there in DIY land, I thought this might be the perfect project to experiment on. I was curious to see what all the hype was about.

Chalk paint promises:

  1. Requires no sanding
  2. Requires no priming
  3. Can be sealed with poly or with wax or can be sanded strategically for a ‘vintage’ look

I was skeptical.

I followed a recipe I found on the Lowe’s website – basically it’s 1/3 cup of water, 1/3 cup of Plaster of Paris and 1 cup of flat latex paint. That made more than enough for two coats on my table, but unfortunately not enough to finish the job. I had to mix some more to finish the leaves properly. I followed their instructions to use a bristle brush instead of foam rollers.

Chalk Paint Table 4

My initial observations

  1. I hadn’t adequately prepared myself for how much more viscous it was going to be compared to regular latex paint. (I don’t quite know why it surprised me that it was watery considering I added water to it! DUH!)
  2. If you have any sort of short edge (like my table does) have a rag handy. Because it’s so much more watery than regular paint, it’s obviously more susceptible to drips.
  3. Chalk Painted Table 1
  4. It dries VERY quickly
  5. The brush strokes on the first coat looked really, really bad. I ‘chalked’ that up to the fact that I was painting a dark brown table very pale yellow. In theory, I was priming the piece and we all know the primer coat never looks pretty right?
  6. Most instructions say this paint cannot be mixed and then kept. I thought that was a lie until I tried to keep mine. It kept for a little less than 24 hours before becoming clumpy and icky. SO – heed that advice. Only mix what you know you will use. If you’re going to leave it, only do so for a matter of hours and make sure you cover your tray with plastic wrap or foil.
    Chalk Paint Table 2

Continue reading

BHCH #10

Friday’s here! Which means it’s time again to take a look at those things that are making us think, yearn, cower and thank, this week…

Brains 

Last summer, much of the work we put into our home involved paring back the overgrown jungle that was our yard.

bhch 10 brains

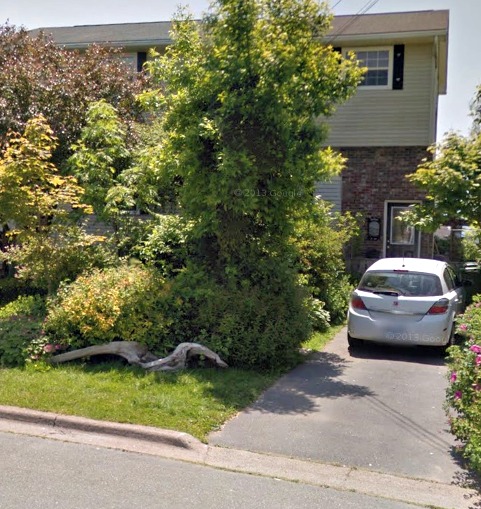
That was our front yard. It’s taken from Google Maps, street view. Envision this yard, left untended for 6 months, and you can picture the work we had to do. I pulled and hacked and dug out countless gnarled, congested, weedy plants, for months.

Some may balk at all the destruction, but know that we didn’t just toss these to the curb with last fall’s leaves. We composted!

It was a learning process. Not knowing much, I opted to throw everything together in a heap.  Over the next 8 months, not everything broke down as I’d hoped, largely because I had too many “woody” products in the mix. Moving forward, I’ve researched better composting solutions,  smarter, more effective methods for our needs.

I came across this great article which offers pit composting as a solution. So simple! Armed with a shovel, dig a hole or trench large enough for your organic waste, then fill the hole! The soil you dug out can be used elsewhere, to help build-up raised flower beds, for example. In 6-12 months time, the footprint of the pit will serve as a great, nutrient-rich bed for planting something new. It also helps keep the compost hidden from view, and from doggy’s prying nose.

Heart

I love ornamental grasses. I’d like to use some to accent our yard, as they’re a nice alternative to flowers for adding colour. Visit almost any garden centre, for ideas.

They also have the unique benefit of provide acoustic “texture” to a garden. I’ve come across some fantastic varieties that should thrive in our climate. Looking forward to using these to helped define our yard!

Here’s a neat arrangement idea, courtesy of Lowes.

Courage

A shout-out to those who’ve taken the plunge, abandoned superfluous possessions, and joined the tiny house movement. I’ve so much respect for these people, and the courage it must have taken to let it all go.

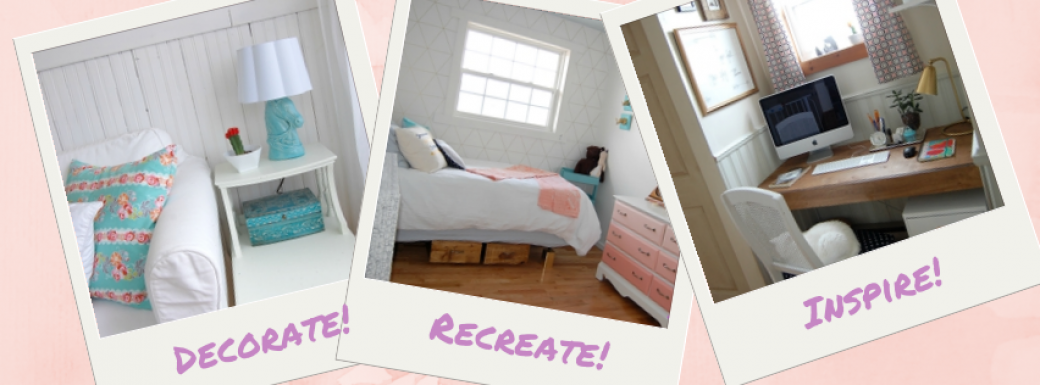
Some great for for thought, coupled with great design (and great use of natural light!) courtesy The Tiny Life

Home

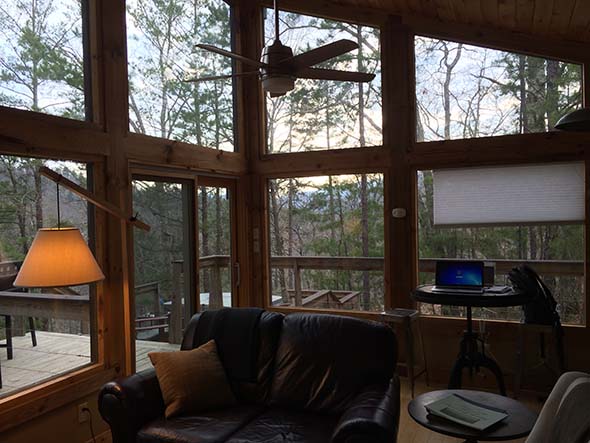
Where do you escape when you need a break?

Erin and I are extremely fortunate that home can be that escape.

Up the stairs, to our guest room, where a view of the Atlantic helps me hit reset, and bring it all back home.

bhch10 1

Keep it simple, folks!

Dan

{New Series} Behind the scenes of a DIY Blogger Part 1 – Our Blog Closet!

Hi there –

Today we launch a new series! We get asked lots of questions about how we manage full-time jobs and a blog. Well, it’s not easy and it requires some organization and planning. Hopefully this series will shed some light on how we aim to make it work!

So first things first, we had to carve out a space for the ‘blog’. Because we take lots of photos and are constantly switching things up season to season etc, our blog actually does take up physical space in our home. At first, things were scattered everywhere! It lead to us buying duplicate items and just plain forgetting the things we had.

We also needed a space to stash ‘partly finished’ projects for when guests come over. The last thing we want is a half-sanded chair or a table covered in wet paint just sitting out in our living space! 🙂

So here’s how we carved out a dedicated space for DIY Passion to live in our house – otherwise known as the blog closet.

New Blog Closet 1

Where is this space, you ask? This is a space we’ve NEVER SHOWN BEFORE! And it certainly wasn’t always this functional.

Recall the following door. It’s the door off our rec room, and it leads to a decidedly awful bathroom.

Blog Closet 1

It’s awful only in its layout: a small rectangular-ish space, cut in half by a dividing wall. Even getting in is awkward, as the door swings inward, cutting into the already narrow room. Here’s a little sketch Dan made using the RoomSketcher web app, so you can see what I’m talking about:

blog closet plans

You can see that nce you’re in, you find yourself in a hallway sized room. There’s a sink and mirror in front of you on a wall that cuts the “hall” in half. You need to walk around this wall to the toilet on the other side. Perhaps down the road we’ll be able to renovate and reconfigure the space into something that actually makes sense!

Blog Closet 2

It was really just wasted space…. and it looked like this for months. Ya. Can you say dumping ground? In fact, I was more inclined to call it a storage space with a bathroom rather than a bathroom with storage space.  Continue reading